
ABSTRACT
All major topics in the design of in-situ retaining systems for deep excavations in urban areas are outlined. Type of wall, water related problems and water pressures, lateral earth pressures, type of support, solution to earth retaining walls, types of failure, internal and external stability problems, displacements of walls and adjacent ground, instrumentation of deep excavation projects are summarized. Sequence of the subjects are given in order of design steps.
KEYWORDS: deep excavation; retaining wall; earth pressure; anchor.
INTRODUCTION
Number of deep excavation pits in city centers are increasing every year. Buildings, streets surrounding excavation locations and design of very deep basements make excavations formidable projects. This chapter has been organized in such a way that subjects related to deep excavation projects are summarized in several sections in the order of design routine. These are types of in-situ walls, water pressures and water related problems. Need for dewatering is discussed in some cases. Earth pressures in cohesionless and cohesive soils are presented in two different categories. Ground anchors, struts and nails as supporting elements are explained. Anchors are given more emphasis compared to others due to widespread use observed in the recent years. Stability of retaining systems are discussed as internal and external stability. Solution of walls for shears, moments, displacements and support reactions under earth and water pressures are obtained making use of different methods of analysis. A pile wall supported by anchors is solved by three methods and the results are compared. Global stability issues are also referred. Type of wall failures, observed wall movements and instrumentation of deep excavation projects are summarized. Finally a design routine is described for preparing deep excavation projects. Topics related to construction methods do not take place in the chapter.
![]()
TYPES OF EARTH RETAINING WALLS
Introduction
More than several types of in-situ walls are used to support excavations. The criteria for the selection of type of wall are size of excavation, ground conditions, groundwater level, vertical and horizontal displacements of adjacent ground and limitations of various structures, availability of construction, cost, speed of work and others. One of the main decisions is the water-tightness of wall. The following types of in-situ walls will be summarized below;
- Braced walls, soldier pile and lagging walls
- Sheet-piling or sheet pile walls
- Pile walls (contiguous, secant)
- Diaphragm walls or slurry trench walls
- Prefabricated diaphragm walls
- Reinforced concrete (cast-in-situ or prefabricated) retaining walls
- Soil nail walls
- Cofferdams
- Caissons
- Jet-grout and deep mixed walls
- Top-down construction
- Partial excavation or island method
Braced Walls
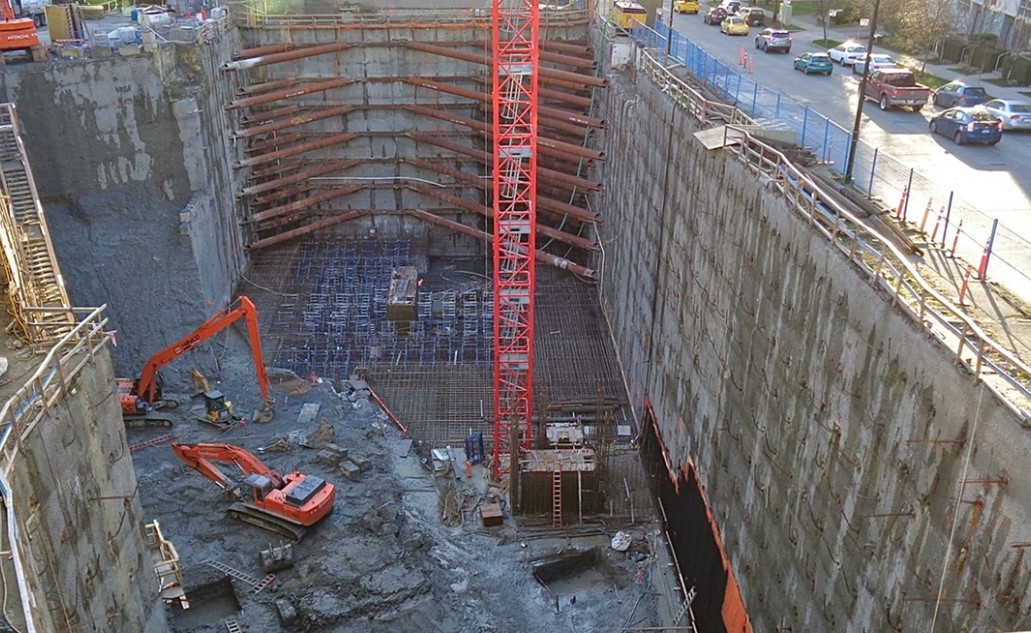
Excavation proceeds step by step after placement of soldier piles or so called king posts around the excavation at about 2 to 3 m intervals. These may be steel H, I or WF sections. Rail sections and timber are also used. At each level horizontal waling beams and supporting elements (struts, anchors, nails) are constructed. Soldier piles are driven or commonly placed in bored holes in urban areas, and timber lagging is placed between soldier piles during the excavation. Various details of placement of lagging are available, however, precast units, in-situ concrete or shotcrete may also be used as alternative to timber. Depending on ground conditions no lagging may be provided in relatively shallow pits. Historically braced walls are strut supported. They had been used extensively before the ground anchor technology was developed in 1970‟s. Soils with some cohesion and without water table are usually suitable for this type of construction or dewatering is accompanied if required and allowed. Strut support is commonly preferred in narrow excavations for pipe laying or similar works but also used in deep and large excavations (See Fig 1.1). Ground anchor support is increasingly used and preferred due to access for construction works and machinery. Waling beams may be used or anchors may be placed directly on soldier piles without any beams.
![]()
Sheet-piling or Sheet Pile Walls
Sheet pile is a thin steel section (7-30 mm thick) 400-500 mm wide. It is manufactured in different lengths and shapes like U, Z and straight line sections (Fig. 1.2). There are interlocking watertight grooves at the sides, and they are driven into soil by hammering or vibrating. Their use is often restricted in urbanized areas due to environmental problems like noise and vibrations. New generation hammers generate minimum vibration and disturbance, and static pushing of sections have been recently possible. In soft ground several sections may be driven using a template. The end product is a watertight steel wall in soil. One side (inner) of wall is excavated step by step and support is given by struts or anchor. Waling beams (walers) are frequently used. They are usually constructed in water bearing soils.
Steel sheet piles are the most common but sometimes reinforced concrete precast sheet pile sections are preferred in soft soils if driving difficulties are not expected. Steel piles may also encounter driving difficulties in very dense, stiff soils or in soils with boulders. Jetting may be accompanied during the process to ease penetration. Steel sheet pile sections used in such difficult driving conditions are selected according to the driving resistance rather than the design moments in the project. Another frequently faced problem is the flaws in interlocking during driving which result in leakages under water table. Sheet pile walls are commonly used for temporary purposes but permanent cases are also abundant. In temporary works sections are extracted after their service is over, and they are reused after maintenance. This process may not be suitable in dense urban environment.

Figure 1.1: Braced walls; plan, section and inside views
![]()

Figure 1.2: Steel and reinforced concrete sheet piles
Pile Walls
In-situ pile retaining walls are very popular due to their availability and practicability. There are different types of pile walls (Fig. 1.3). In contiguous (intermittent) bored pile construction, spacing between the piles is greater than the diameter of piles. Spacing is decided based on
type of soil and level of design moments but it should not be too large, otherwise pieces of lumps etc. drop and extra precautions are needed. Cohesive soils or soils having some cohesion are suitable. No water table should be present. Acceptable amount of water is collected at the base and pumped out. Common diameters are 0.60, 0.80, 1.00 m. Waling beams (usually called
„breasting beams‟) are mostly reinforced concrete but sheet pile sections or steel beams are also used.
Tangent piles with grouting in between are used when secant piling or diaphragm walling equipment is not available (i.e. in cases where ground water exists). Poor workmanship creates significant problems.
Secant bored pile walls are formed by keeping spacing of piles less than diameter (S<D). It is a watertight wall and may be more economical compared to diaphragm wall in small to medium scale excavations due to cost of site operations and bentonite plant. There is also need for place for the plant. It may be constructed “hard-hard” as well as “soft-hard”. “Soft” concrete pile contains low cement content and some bentonite. Primary unreinforced piles are constructed first and then reinforced secondary piles are formed by cutting the primary piles. Pile construction methods may vary in different countries for all type of pile walls like full casing support, bentonite support, continuous flight auger (CFA) etc.
Diaphragm Walls
Diaphragm wall provides structural support and water tightness. It is a classical technique for many deep excavation projects, large civil engineering works, underground car parks, metro pits etc. especially under water table. These reinforced concrete diaphragm (continuous) walls are also called slurry trench walls due to the reference given to the construction technique where excavation of wall is made possible by filling and keeping the wall cavity full with bentonite- water mixture during excavation to prevent collapse of the excavated vertical surfaces. Wall thickness varies between 0.50 m and 1.50 m. The wall is constructed panel by panel in full depth.
![]()
Panel lengths are 2 m to 10 m. Short lengths (2-2.5 m) are selected in unstable soils or under very high surcharges. Nowadays depth of panels exceeded 100 m, excavation depths exceeded 50 m. Different panel shapes other than the conventional straight section like T, L, H, Y, + are possible to form and used for special purposes. Panel excavation is made by cable or kelly supported buckets and by a recent design called „cutter‟ or „hydrofraise‟ which is a pair of hydraulically operated rotating disks provided with hard cutting tools. Excavation in rock is possible. Slurry wall technique is a specialized technique and apart from the bucket or the frame carrying the cutter equipment like crawler crane, pumps, tanks, desanding equipment, air lifts, screens, cyclones, silos, mixers, extractor are needed. Tremie concrete is placed in the slurry starting from the bottom after lowering reinforcement cages. Joint between the panels is a significant detail in water bearing soils and steel pipe, H-beam or water stops are used (Fig 1.4).
Intermittent (Contiguous) bored pile wall

![]()
![]()

![]()


![]()
![]()
grouted in water
bearing soils
OR
Breasting Beam
c) Secant bored pile walls
b. Tangent bored pile wall
Figure 1.3: Types of pile wall
![]()
Stop end pipe
![]()
Figure 1.4: Joints between the panels in diaphragm walls
Prefabricated Diaphragm Walls
Same principles apply as the diaphragm walls, with bentonite-cement suspension in the trenches. Then prefabricated panels are placed inside the trench and the slurry mixture is set. The panels are excavated to the depth required for tightness, while the prefabricated elements are placed only to the depth required for ground retaining (Fig. 1.5). Concrete prefabricated panels may be designed quite thin by the use of good quality concreting and reinforcement. Sheet piles or prefabricated steel slabs may also be used.
Reinforced Concrete (Cast In-Situ or Prefabricated) Retaining Walls-Excavation in Stages
It is a common type of staged excavation wall usually supported by ground anchors (Fig. 1.6). Soils with some cohesion are suitable because each stage is first excavated before formwork and concrete placement. No water table or appreciable amount of water should be present. Sometimes micropile support is given if required due to expected cave-ins.
Figure 1.5 Section view of prefabricated diaphragm wall

Figure 1.6: Reinforced concrete retaining walls – excavation in stages
Soil Nail Walls
Similar to the method above excavation is made step by step (1.5 to 2 m high). Shotcrete is common for facing and wiremesh is used. Soft facing is also possible making use of geotextiles. Hole is drilled, ordinary steel bars are lowered, and grout is placed without any pressure. Soil should be somewhat cohesive and no water table or significant water flow should be present.
Cofferdams
Cofferdam is a temporary earth retaining structure to be able to make excavation for construction activities. It is usually preferred in the coastal and sea environment like bridge piers and abutments in rivers, lakes etc., wharves, quay walls, docks, breakwaters and other structures for shore protection, large waterfront structures such as pump houses, subjected to heavy vertical and horizontal loads. Sheet piling is commonly used in various forms other than conventional walls like circular cellular bodies or double walls connected inside and filled with sand. Stability is maintained by sheeting driven deeper than base, sand body between sheeting and inside tie rods. Earth embankments and concrete bodies are also used. Contiguous, tangent, secant piles or diaphragm walls are constructed in circular shapes, and no internal bracing or anchoring is used to form a cofferdam. Reinforced concrete waling beams support by arching (Fig. 1.7). Shafts are also made with this method. Large excavations or project details may require additional lateral support.
Caissons
 Caisson construction is restricted to major foundation works because of large construction cost. Caissons sunk in water are more common than land caissons. Sea caisson is a cellular or single piece concrete structure constructed on land and towed to site and sunk by filling inside (Fig. 1.8). Land caisson is an open concrete section at the top and bottom, and it is lowered into its position by excavating inside and adding in-situ concrete section on top. Caisson may be advantageous to other systems in cases where the soil contains large boulders which obstruct penetration of piles or bored piles, and large lateral forces may necessitate a massive structure. There are also pneumatic caissons where excavation is carried out under air pressure.
Figure 1.7: No internal bracing or anchoring is required due to arching

Figure 1.8: Types of caissons
Jet Grout and Deep Mixed Walls
Retaining walls are made by single to triple row of jet grout columns or deep mixed columns. There is a soil mixed wall (SMW) technique specially developed for wall construction where H sections are used for reinforcement. Single reinforcing bar is placed in the central hole opened for jet grout columns. Anchors, nails or struts may be used for support.
Top Down Construction
Retaining structure (generally diaphragm wall) is designed and constructed as permanent load bearing walls of basement. Piles or barettes are similarly placed to complete the structural frame. Top slab is cast at the ground surface level, and excavation is made under the slab by smaller sized excavators and continued down forming basement slabs at each level. There are special connection details. Top down method is preferred in highly populated city centers where horizontal and vertical displacements are very critical, and anchors and struts are very difficult to use due to complex underground facilities and lifeline structures and site operations are difficult to perform.
Partial Excavation or Island Method
It is possible to give strut support to retaining walls at a later stage after constructing central sections of a building in large size excavations. Core of the structure is built at the central part making sloped excavations at peripheral areas and then the core frame is used to give support to walls (Figure 1.9). It may be more practical and construction time may be less compared to conventional braced system. This method may not be suitable in soft and weak soils due to stability and deformation problems during sloped excavations.
Figure 1.9: Partial excavation or Island method
![]()

Sloped excavation
In-situ retaining wall
WATER PRESSURES ACTING ON RETAINING SYSTEMS AND RELATED PROBLEMS
Introduction
The presence of water or water table is one of the most important criteria for the choice of the type of wall and construction method. Site investigation studies frequently report water in borehole logs but sometimes it may not be clear whether it is a water table, a perched level, a significant source of water, leakage from a water main, surface water infiltration or due to granular pockets and lenses. If there is plenty of water a watertight type of wall has to be selected otherwise water seeping through the wall is drained off. Most municipalities do not allow pumping and groundwater lowering. If the excavation is located at an area without such a restriction it may be economical to lower groundwater table and to select a wall which is not watertight. This procedure was common in the past decade. In open areas there may not be need for walls, and sloped excavation and dewatering will suffice. Groundwater lowering causes both total and differential settlements of structures if relatively compressible soils are present.
Soil Investigations
Technical data related to existing groundwater conditions should be investigated, and the need for groundwater control in making the excavation, planning a dewatering system to meet the job requirements and its effect on adjacent structures, specifications, monitoring and the necessity for recharge of the exterior water table should be assessed. Soil investigations generally include determination of piezometric levels, presence of perched, depressed or artesian water levels, detailed description of soil layers, grain size analyses of aquifer soils. Depending on the project more detailed investigations may be made like borehole permeability tests, water pressure
tests, well pumping tests and observation wells. Local studies on groundwater regime are also helpful if available.
![]()
Water Pressure on Walls
No water pressure is considered on walls through which water can pass. Drainage measures are taken inside the excavation pit at every and final stages. Acceptable amount of water should be drained this way. Water pressure acting on watertight walls shows variations depending on type of soils throughout depth and below base of wall. If there is no seepage beneath the base due to impermeable soil or impervious grout slab (blanket) hydraulic pressure distributions prevail (Fig. 2.1, cases 2 and 3). If there is seepage into the excavation through the base in case of permeable soil (case 1) flow should be acceptable and there should not be any risk of piping (See Fig. 2.2 for piping check). Flow of water exerts a hydrodynamic pressure in addition to hydrostatic pressure. As it flows downwards on the active side of the wall it increases effective overburden pressure. Reverse effect occurs on the passive side and effective overburden and earth pressures are reduced. The effect on the passive overburden is more significant as far as the passive resistance is concerned. In other words, water pressures on the active side are reduced compared to hydrostatic values and increased on the passive side. Approximate estimation of water pressure during steady seepage without sketching flow nets is shown in Fig. 2.3 (Padfield and Mair, 1984). This method is not suitable for narrow trench like excavations, and use of flow nets are recommended.
Very permeable soils cause high flows, and should not be allowed. The flow, drainage and pumping out result in drops in water levels outside the excavation. Recharge wells may be required outside the walls if drops in water level are not allowed. If there are compressible soils in the profile, buildings and lifeline structures are expected to settle due to groundwater lowering.

Figure 2.1: Water Pressure acting on watertight walls show variation depending on the type of soils throughout the depth and base of the wall
- Deep Permeable Soil Deep Slab or Blanket
- Pressure Gradient Beneath the Base
![]()

Figure 2.3: Approximate estimation of water pressure during steady seepage
![]()
Dewatering
Dewatering methods are applied in cases where there is need for control of water pressures and/or flow. Fig. 2.4 shows some dewatering schemes using wells and wellpoints in permeable soils. Mainly, base pressure gradients and/or flow are reduced or eliminated.
Several methods are available. Detailed description of dewatering works can be seen in CIRIA (1993), CIRIA (1986) and Powers (1992).
Common techniques are:
- Shallow ditches, training walls, sumps and pumps
- Single-staged or multi-staged well points
- Shallow or deep wells
Water flow problems may sometimes be encountered in excavation projects unexpectedly. These are flow through flaws on the watertight walls, from unidentified perched levels, sources or pockets through non-watertight walls, through soil-wall interface under artesian conditions or leakage from anchor holes.

Figure 2.4: Examples of dewatering schemes using wells and wellpoints in permeable soils
![]()
EARTH PRESSURES ON IN-SITU RETAINING
WALLS
Introduction
Earth pressures on in-situ retaining walls are rather different than those on ordinary retaining walls due to the supporting elements. Free displacement of walls are not allowed. Type of support affects the distribution of earth pressure. Strut loads were measured in strutted excavations in many countries in the past, and recommendations were given. Ground anchor technology is relatively new, and data on instrumented anchored walls for total lateral pressure and for water pressure are being accumulated. Earth pressure diagrams on strutted and anchored walls are expected to be somewhat different due to stiffer support conditions in the former. Theoretical approaches will also be discussed.
Earth Pressure Distributions on Walls
Terzaghi and Peck (1967) and Peck (1969) based on load measurements on struts recommend the pressure distribution shown in Figure 3.1 for cohesionless soils. It is a uniform pressure and given by Eq. 3.1;
p = 0.65 KA γt H 3.1
where KA is the active earth pressure coefficient, H is the height of wall. Unit weight (γt) is described as the bulk unit weight in the original references. Since braced excavations were generally dewatered in the past projects the unit weight in the expression was described as wet or bulk. If wall is watertight and water table is present, buoyant unit weight should be used under water table and water pressure should be added.
+ water
pressure
γt = wet unit weight of soil, buoyant under water KA= (1-sin φ‟) / (1+ sin φ‟) = tan2 (45- φ‟/2)
φ‟ = angle of internal friction
Figure 3.1: Earth Pressure Envelope on Wall, Granular Soil, Terzaghi and Peck (1967) and
Peck (1969)
![]()
The rectangular diagram proposed in the figure is not an actual pressure distribution but an envelope obtained by plotting the measured strut loads converted to pressure distribution at each stage of excavation including the final depth covering all distributions. It is also called apparent pressure distribution. It is regarded as a conservative approach because strut loads calculated by such an envelope are generally greater than the measured loads. Rectangular envelope with p =
-
- γt H is also recommended by Twine and Roscoe (1996) based on more recent field measurements. Similarly use of submerged unit weight below water table and addition of water pressure is recommended.
Data on cohesive soils are classified for soft to medium stiff clays and stiff clays separately.
Terzaghi and Peck (1967) and Peck (1969) recommendations are summarized in Fig. 3.2.
Twine and Roscoe (1996) differentiates flexible and stiff walls (i.e. sheet pile walls vs. secant R.C. pile walls alike) in their recommendations for clay soils (Fig. 3.3). It is seen that envelopes are greater in case of stiff walls.
Anchor or nail supported walls may show higher lateral displacements, and stress increases at the upper levels of walls may be somewhat less compared to the distributions on strutted walls. However, there are no documented comparisons. In the solution of anchored walls by finite element, boundary element, finite difference softwares or simpler spring models the analyses may be repeated without assigning pre-tensions initially like in case of nail supported walls and then assign the calculated reactions as pre-tensions.

Figure 3.2 Apparent Pressure Distributions for Soft to Medium and Stiff Clays, Terzaghi and Peck (1967) and Peck (1969)

Figure 3.3: Earth pressure distribution on flexible and rigid walls for clay soils (Twine and Roscoe, 1999)
Katsura et.al.(1995) summarizes Japanese codes on lateral earth pressures on walls based on strut load measurements and earth pressure cell measurements (Fig. 3.4). There are also recommendations on selection of the type of distribution in relation to height of braced walls. Distributions based on pressure cell records are recommended for all heights but distributions by strut load measurements are not found suitable for walls higher than 15 m, they may be used for walls of 10 – 15 m height depending on conditions of the ground and construction and recommended for heights less than 10 m.
Another common case is an alluvial profile where clay, silt, sand layers mixed in different proportions lie in different thicknesses. If a dominant layer is present one of the above distributions may be selected, otherwise a theoretical approach like Coulomb‟s earth pressure expression may be followed making use of effective parameters, submerged unit weights and added water pressure.
Effect of different surcharge loads on walls may be calculated by stress distributions in elastic medium (e.g. NAVFAC 1982). For the upper limit of very rigid walls the distributions are doubled. Wide surcharge loads may also be converted to equivalent heights of soil layer.

Figure 3.4: Lateral pressure distribution diagrams based on earth pressure cells on wall
(Katsura et.al., 1995)
SUPPORTING ELEMENTS
Ground Anchors
-
-
- Introduction
-
Ground anchor is a common type of supporting element used in the design and construction of in-situ retaining walls. It is an installation that is capable of transmitting an applied tensile load to a load bearing stratum which may be a soil or rock. A summary about ground anchors will be given in this section. Types, capacity, design, construction and quality control will be reviewed.
-
-
- Types and Capacity of Anchors
-
Temporary anchor and permanent anchor are the main types and as the names imply the former is used in temporary works and usually a period of maximum two years are assigned as the design life. Design life of a permanent anchor is the same as the life of structure. Corrosion protection details and factors of safety are the main differences between the two types. Section of
![]()
an anchored wall, details of anchors are shown in Fig. 4.1. Free length is a function of height of the wall. Fixed length is selected according to type of soil and it varies between 3 m and 10 m. Fixed length is the tensile load bearing part of an anchor in soil. There are different mechanisms of stress transfer from the fixed anchor zone to surrounding ground. It is usually referenced as
„bond‟ stress and depends on soil type and grouting procedure. Excepting special constructions in fixed part of anchors like under reams in stiff clays, jet grouted bodies or inflated aluminum bags, most common type of construction is cement (and water) grout with some additives. Very stiff, hard soils and rocks may be grouted without pressure. Many soils may be grouted but grouting pressure, water cement ratio (w/c) and additives play major role depending on the permeability and stiffness of the soil. Fixed length of anchor enlarges in diameter with increasing grout pressure. Grout permeates or fractures or pushes the soil around depending on type of soil, grout and pressure level. Coarse and fine grained granular soils, alluvial soils and weak rocks are generally grouted with several bars of pressure through casing or using packer. Stiff cohesive soils and fine cohesionless soils may be grouted at higher pressures (greater than 15-20 bars) to form highly fractured larger fixed end bodies to obtain higher capacities. Post-grouting techniques through tube and manchette (sleeve tubing) or double/triple tubing are used. Main possibilities in failure of a single anchor are failure of ground/grout interface, tendon itself or grout/tendon interface. Minimum safety factors recommended for design of individual anchors are summarized in Table 4.1 (BS8081).
Table 4.1: Minimum safety factors recommended for design of individual anchors
|
Type of anchor |
Ground/grout interf |
Tendon |
Grout/tendon o encapsulation interface |
|
Temporary anc |
2.0 |
1.6 |
2.0 |
|
Permanent anc |
3.0 |
2.0 |
2.0 |
Note: * 2.5 if no tests are available
# 3.0 if no tests are available
Capacity of anchors in cohesionless soils depends on average grain size (D50), uniformity coefficient (CU), relative density (RD), fixed length, diameter of drill hole, method of grout injection (primary/secondary) and grout pressure. Higher D50, CU, RD and grout pressure result in higher capacities. Fixed lengths of 4 to 8 m are in use and 6 m seems to be a lower limit of recommendation for fine to medium sands, and the lower limit may be less for gravelly soils. Permeability and grout characteristics (i.e. water-cement ratio, pressure) are key factors for capacities. At lower pressure levels (less than 1 MPa) and higher pressures (more than 2 MPa) capacities from 400/500 to 1400/1700 kN are observed in fine to medium sands and dense coarser sands and gravels respectively. This wide range is due to enlargement of the drill hole and more grout intrusion in coarser soils. Calculations by soil mechanics principles cannot explain these capacities. Best way is to perform tests on design anchors.
Load capacity of anchors in clays is low compared to sandy and gravelly soils. Fixed anchor lengths in design are usually 7-8 m. Application of low grouting pressure (less than 1 MPa) and use of casing tubes may be beneficial to the capacity. Casing tubes also prevent formation of remolded soft cohesive film on borehole surface in layered soils which reduces capacity significantly. Capacity of anchors can be increased in stiff fissured clays using high pressure grouting and post-grouting. High pressure causes hydrofracturing and/or penetration of grout into existing fissures. Using bells or under-reams in the fixed anchor zone in stiffer clays (cU>90 kPa) also increases capacity. Tremie grouted straight shafts in very stiff or hard soils yield sufficient
![]()
capacities similar to anchors in rock. Skin friction (m) increases with decreasing plasticity and increasing consistency ((wL– w)/IP). m range is from 50 to more than 400 kPa in stiff clays. Pressure grouting is also used in rock. Skin friction or bond values for variety of rocks can be found in BS(8081) and other references.
Grout is in tension like the tendon, and it is assumed that ultimate bond stress between grout and tendon is uniform. For clean strands and deformed bars a limit of 2 MPa is recommended. Bond strength can be significantly affected by the surface condition of the tendon, particularly when loose and lubricant materials or loose rust, soil, paint are present at the interface. Minimum grout compressive strength of 30 MPa is recommended prior to stressing. At grout/encapsulation interface maximum ultimate bond is taken 3 MPa. Encapsulations are usually used in permanent anchor applications against corrosion, and single or double (concentric) corrugated plastic or metal ducts cover single or multi-unit tendons and grouted. Details at head, free length, seal between free and fixed lengths and fixed length vary in many different patented designs (See for example FIP,1986).
-
-
- Planning of Anchors
-
Free length at each excavation stage and fixed length are selected. Fixed length in cohesionless and cohesive soils has been discussed in the previous section. It is usually kept constant in a project. Fixed length has to be placed outside the active wedge behind wall. It is customary to add an extra to free length (Fig. 4.2). This is especially useful in projects in stiff clays where deformations at the back of wall extend to distances three times the depth of excavation. Minimum spacing of anchors should be 1.5-2 m and minimum distance of 2-3 m should be provided between the fixed lengths. An anchor density of 3-8 m2/anchor generally observed in projects depends on factors such as water pressure, type of soil, depth of excavation etc. If closely spaced anchors are used either adjacent anchors are designed at different angles with the horizontal like 10o and 15o or identical rows are not used (Fig. 4.3). Angles between 5o and 25o with the horizontal are normally selected unless fixed lengths are located in deeper competent layers. Two anchors may be placed at the same anchor head at different angles if required. It is considered a good practice to design positions of fixed lengths in a disorderly manner (Fig. 4.4). Another recommendation is to keep the whole fixed length in a single layer in layered soils if possible. Distance of fixed length to any adjacent foundation/underground service is recommended 3 m minimum. Spacing of anchors is controlled by type of wall, and vertical distance between rows is determined by a trial and error process (i.e. anchor capacity vs. spacing, reaction forces etc.). Anchors at convex corners may be planned like shown in Fig. 4.5.

Figure 4.1: Anchor with strand tendon, examples of different corrosion protection

Figure 4.2: Addition of an extra length to free length outside the active wedge

Figure 4.3: Use of staggered rows for closely spaced anchors

Figure 4.4: Design positions of fixed lengths in a disorderly manner

Figure 4.5: Layout of anchors at convex corners
-
-
- Materials and Construction
-
Ordinary Portland cement is commonly used in grouting. It should be fresh and should be kept in damp free conditions. If there is a risk of chemical attack, sulphate resisting Portland cement should be used. Water/cement ratio is between 0.4-0.5 and fluidifiers are generally used. Other additives like accelerators, retarders, expanders or antibleed agents may be used if required. Setting of grout after injection takes time, and early prestressing damages anchor. Although characteristics of cement and w/c ratio play role, a waiting period of minimum ten days is recommended to reach a grout strength of 30 MPa.
Seven wire strands of 12.7 mm (0.5”) and 15.7 mm (0.6”) diameters and 3-5 in number are commonly used in urban excavation and support works. These have ultimate strengths of about 1600-1900 MPa, and safety factors of 1.6 and 2.0 are recommended for temporary and permanent applications. Single bars are available from 26 mm to 50 mm diameter in 835/1030 and 1080/1230 MPa grades (ultimate/yielding) reaching over 1000 kN service loads.
Method of drilling varies in different type of soils and rocks. Solid or hollow core augering is generally preferred in clays. Alluvial deposits of sand and clay may necessitate casing (with or without flushing). Cohesionless soils under water usually require casing. In loose silt and sand deposits under water driving casing tubes with detachable end pieces may be a good method rather than drilling. Pneumatic methods are generally employed in rock. 1/30 deviation (about 2o) should be expected in drilling works. 100-125 mm drilling diameter is commonly used. Collapse of material in boreholes should be carefully controlled.
Tendon preparation is performed at site or in workshop, and the former is more common in case of temporary anchors. Installation (homing) requires mechanical aid for long anchors. Plastic or metal borehole centralizers must be used in every 1-3 m, and a nose cone helps lowering of the assembly. Plastic spacers /centralizers should be arranged such that a grout cover exists around tendon.
Grouting method and pressure level significantly affect anchor capacity. Pumps should be displacement type and must be capable of exerting 1000 kPa. If high grout pressures are planned
![]()
type of pump and all connections have to be carefully selected. Grout is prepared by high speed mixers in few minutes before taken into agitator where depending on additives used mixed slowly and pumped into hole before setting starts. Ideally grout properties like fluidity, density and bleed should be controlled by usual tests (i.e. flow cone, mud balance, graduated cylinder). Drilling, installation and grouting are recommended to be completed in the shortest possible time.
Corrosion protection of anchors is a very important subject for permanent anchors and for temporary anchors in aggressive environment. There are single or double protection considerations with one or two concentric sheaths grout placed in between. There is a variety of protective coatings or coverings. Greases are commonly used. The principles of protection are the same for anchor head, free length and tendon bond length although details are different. Epoxy and polyester resins may be used in encapsulations. Cement grouts are common.
-
-
- Testing
-
There are three categories of anchor testing. These are proving tests, on-site suitability tests, and on-site acceptance tests. Proving testing program is a very detailed program, and generally is not relevant to standard excavation projects. Procedures (drilling, preparation of tendon assemblies, homing, grouting etc.), materials used in anchor technology and new materials, soil types, fixed lengths are changed and large number of tests are performed. On-site suitability tests are performed under identical conditions to working anchors before an anchor contract to check capacities and total meters in the project. If time is limited a similar program on project anchors may be performed. On-site acceptance test is a routine recommended to be performed on each project anchor, and is based on applying a greater (proof) load than project load (25 % and 50 % more for temporary and permanent anchors respectively) in a short time. It can be compared with on-site suitability tests which are performed in longer time. There are three criteria: a. proof load should not reduce more than 5 % in 15 min. b.calculated free tendon length (called „apparent‟ length) should match with the actual free length c. short term service behavior checks loss of project (or locking) load with time. Stages (a) and (b) combined take about 30-40 minutes and stage (c) depends on selected time period. In medium and large sized projects it is a full time job for a crew. Details can be seen in BS 8081.
Struts
-
-
- Introduction
-
Strut is a compression member to provide temporary support to in-situ retaining walls in deep excavations. It is mostly a steel beam of various sections or a pipe. Reinforced concrete beams are seldom used. Struts usually span the width of excavation and in cases of very wide excavations vertical support is needed. It is an old support system compared to ground anchor which has been used since mid Seventies. Placement and removal of struts in multi-level systems interfere with construction, and it is the major disadvantage. It is relatively quicker compared to anchor support.
![]()
-
-
- General Information
-
Experience gathered during the early metro construction activities in the U.S. and Europe till 1970‟s still guides the present design principles. Apparent earth pressure envelopes proposed by Terzaghi and Peck(1967) and Peck(1969) based on measurement of strut loads in several projects are commonly used in the design of strutted support of excavations (See Section 3).
Design of a strut support system includes:
-
-
- Preliminary specification of strut pattern (geometrical lay-out, horizontal/vertical spacings),
- Estimation of loads in different soils by methods of analysis, and selection of length, type, size, section of props,
- Design of strut-waling connections and waling beams.
-
Design of a strutted retaining system is affected from several factors like sequence of excavation and placement of supports and their stiffness and wall stiffness. If span width is large steel strut section is generally preferred and in cases where depth of excavation is comparable to width, reinforced concrete may be an alternative. Steel H sections and pipes are common but availability and practical fabrication details govern the selection. Simple end details for tight placement, minimum cutting requirements during removal and least interference problems with construction activities are preferred. Short spans or trenches are supported by proprietary struts easily which are also capable of applying preloads. Preloads on stiff large sections may not be very effective.
Horizontal and vertical spacing of struts is related to construction activities and both of them are kept as large as possible. 4 m to 5 m spacing is common but if side dimension or diameter of support is considered net distance between struts is somewhat less. Geometry of system depends on size and shape of excavation. Fig. 4.6 shows some examples.
Poor detailing and mistakes during removal of struts are sometimes reported as the reason for damages and collapses. As far as unexpected (extra) movements of propped systems are considered; depth of excavation to first prop level, over-excavation, delays in prop support, loose installation are the common causes. Measurements on struts disclose that they are structurally overdesigned in many cases. Buckling due to excessive loading or insufficient capacity of section is not frequently encountered. Temperature changes cause increase or decrease in strut loads but level of safety factors for struts allocated in design and earth pressure envelopes usually compensate these changes.
Nails and Bolts
Nails and bolts are used as supporting elements similar to anchors. They are also very similar in construction. Nail and bolt are the same inclusions but called with different names in soil and rock respectively. Main differences compared to anchors are:
- Ordinary reinforcing steel is used instead of prestressing strands and bar,
- Cement grout is filled into drillhole without any pressure,
![]()
- No prestressing is applied, nut or welding may be used at head on a plate,
- Mobilization of capacity starts when wall shows displacements(passive inclusion),
- Nail lengths are lower for the same wall height, nail design capacities are lower,
- Horizontal and vertical nail spacings are lower(1-2 m).
Figure 4.6: Some examples for the geometry of strutted systems
Assembly of bar tendon with centralizers and grouting tube is lowered into borehole. If nails are designed for permanent use they are protected along full length and at the head similar to permanent anchors. Nail capacities are low due to low tendon capacities (60-160 kN allowable, st III approximately), and bond capacities are higher. It is interesting that displacements of nail supported walls are very similar to those of other walls. Nails may be employed on various types of in-situ walls but they are usually applied on shotcrete walls reinforced with one to three layers of wire mesh. Analysis of nailed walls is similar to that of anchored walls. Prestressing effects are ignored. There are also specialized softwares for the analysis of nailed walls, and nails are assumed to take axial loads only. Details are available for head plate, corrosion protection etc.
DISPLACEMENTS OF ADJACENT GROUND DUE TO DEEP EXCAVATIONS
Introduction
When deep excavations are made and in-situ retaining walls are constructed horizontal and vertical displacements occur around the excavation pit. They have to be kept at acceptable limits otherwise damage to buildings, roads and underground facilities will occur. Large number of excavation pits are opened every year worldwide and some of them are instrumented. In this section expected displacements will be summarized in different soils.
Factors Affecting Wall movements
There are several factors affecting wall movements. These are soil and groundwater conditions, changes in groundwater level, depth and shape of excavations, type and stiffness of wall and its supports, methods of construction of the wall and adjacent facilities, surcharge loads,
![]()
duration of the wall and others. Studies like Clough and O‟Rourke (1990) and Long (2001) collected information on instrumented walls and categorized mainly according to type of soil. Type of wall is also indicated.
Researches on Wall Movements
Table 5.1 shows maximum lateral wall movements and maximum vertical settlements behind walls normalized by excavation height. Soils are classified as soft soil or stiff soil. Cohesionless and cohesive soils are indicated. Effect of the factor of safety against base heave and the effect of the type of the supporting system is also considered.
Instrumentation of Deep Excavations
Deep excavations are instrumented before any excavation works start. They are needed for controlling the behavior of wall and surrounding facilities. Displacements may not be detected by visual inspection up to a certain level. There are many instruments that can be installed as summarized in Table 5.2. Some of them are more frequently used in deep excavation projects. These are inclinometers, horizontal and vertical extensometers, piezometers and surveying methods to measure horizontal and vertical displacements of both wall and adjacent facilities. Inclinometers may be placed in boreholes and/or in piles and diaphragm walls. An extra number of instruments in each category must be allowed because damage occurs during construction activities. Load cells on struts or anchor heads may be very useful in checking the calculated project loads.
![]()
 Table 5.1: Maximum wall movements and vertical settlements behind walls
![]()
Table 5.2: Instrumentation and monitoring of deep excavations
ANALYSIS OF SUPPORTED IN-SITU RETAINING
WALLS
Introduction
Analysis of walls involve both internal and external stability calculations. Solution of walls for support reactions, wall displacements, shears and moments is an internal stability problem. Overall or wedge stability and base stability calculations are in the external stability category. It may be appropriate to review failure modes of walls before discussing stability.
![]()
Failure of Walls
Failure of anchor supported walls are observed to occur in several ways. Modes of failure may be listed as follows:
- Both anchor length and penetration depth is short. Wall fails like an overall stability failure but failure surface is located just behind anchors or at fixed length zone and below penetration depth. Failed mass is like the active wedge.
- Overall stability failure. Slip surface is behind fixed length of anchors. Wall and anchors altogether rotate. This type of failure generally occurs in soft and weak soils and excavations in slopes. If instability detected at the time of project calculations longer anchor lengths and deeper embedment are designed.
- Penetration depth is sufficient but anchors are short and a large mass containing fixed length zone separates from soil mass behind and tilts forward.
- Wall may fail reaching its structural capacity due to overloading.Some of the anchors may also get damaged (at the head or pull-out).
- Insufficient number of anchors result in excessive anchor loads and anchors fail one by one leading to complete wall failure.
- Excessive deformations on very flexible walls sometimes cause problems at anchors and waling even if wall retains its stability.
- Excessive base heave in soft soils may cause complete wall failure. This type of failure infact a bearing capacity failure due to unloading.
- Accumulated vertical components of anchor forces cause bearing capacity failure of wall in soft soils. Vertical displacement of wall damages anchors.
- Piping in cohesionless soils, if not prevented, causes boiling near base inside and loss of passive resistance, and water and soil transferred inside through large openings leads to failure of wall.
- Undetected artesian pressures under relatively impervious soils may cause blow out of base resulting in submergence of excavation pit.
If struts are used as supporting elements failure modes hold true except No‟s 1,3,8. In an additional mode wall height between the lowest strut and tip of embedded part may show excessive deformation or failure due to insufficient passive resistance and/or excessive loading.
Internal Stability
Cantilever and single supported walls may be solved by simple limit equilibrium assumptions using fixed earth support and free earth support methods respectively since penetration depth in the former is considerably greater than that in the latter. Analysis of multi-level anchored and strutted insitu retaining walls is a complex internal stability issue, and it is not usually attempted by manual calculations although it may be approximated by introducing hinges on the wall or making use of tributary areas of apparent distributions. Walls supported at more than single level are solved by one the following methods:
- Approximate Methods: Wall may be solved by assuming an earth pressure distribution on a simply supported or continuous beam (wall) or sometimes considering an extra (virtual) support in the penetration depth. Support reactions, shear and moments of the beam are solved.
- Multi-level supported walls may also be analyzed by employing a soil-structure interaction model (beam on elastic soil) either by a beam fully supported by springs (anchors and soil) or wall is represented by finite elements and anchors and soil along penetration depth by springs, and apparent earth pressure distributions act on the beam. Selection of horizontal moduli of subgrade reaction in different type of soils is needed together with anchor springs. Anchor spring can be formulated by the following expression;
k = (AE/sL) cos β 5.1
where A and E are tendon area and modulus, s horizontal spacing of anchors, L free length, β angle between anchor axis and the horizontal. Spring moduli for walls recommended by (The German Society for Geotechnics, 2003) in relation to strain level for different soils are presented in Table 6.1. These values are for passive resistance of soils.
- Finite element method is relatively a new technique for solution of walls. Full finite element mesh and elements for soil, wall and anchors are described and soil properties and soil models can be input. Soil properties like c‟, φ‟, E‟ and wall characteristics are required. Moment, shear, displacements of wall and anchor reactions are presented and displacement vectors can be observed. Programs automatically solve in stages (i.e. every excavation and support level is solved and displacements are accumulated). In simple methods and methods use subgrade reaction critical stages should be checked if possible.
- There are also finite difference, boundary element and other numerical techniques but not commonly used in geotechnical offices.
Table 6.1: Guide values for the modulus of subgrade reaction ks,h for soil above the
groundwater table

There are several commercial softwares available for the above solution methods. Table 6.2 shows the results obtained from different softwares for a 19 m deep anchored excavation in stiff clay. Contiguous pile wall is formed by 0.80 m diameter bored piles spaced at 2.4 m. Vertical and horizontal spacing of anchors are 2.5 m and 2.4 m respectively. A section view of the anchored wall can be seen in Figure 6.1. Modulus of horizontal subgrade reaction is taken as 10 MN/m3. It is seen that there are substantial differences in anchor reactions, shear forces and displacements. Solutions are not sensitive to spring coefficients. First method is a full finite element method, soil properties are input, second method is a structural program, earth pressure is applied on the wall and soil springs are in the penetration depth ,in the third method soil properties are required, no earth pressure is assigned, spring coefficient for the soils are asked for.

![]()
 Table 6.2: Results of analyses obtained in different methods
Figure 6.1: Section view of the anchored wall
External Stability
-
-
- Overall stability
-
Overall stability calculations are integral part of deep excavation projects. They are especially important in soft soils and sloping ground. Overall stability checks are made by slope
![]()
stability software using circular or general slip surfaces. Selection of strength parameters for short and long term analyses should be made on potential surfaces (Fig. 6.1). Tilting and stability of anchored soil mass is also checked by force equilibrium (Fig. 6.2).

Figure 6.1: Potential failure surfaces for short and long term analyses

Figure 6.2: Checks for tilting and stability of anchored soil mass
FF
-
-
- Base Heave
-
Deep excavations and retaining systems may fail by excessive bottom heave. This type of failure usually occurs in soft and weak soils rather than in stiff clays and cohesionless soils. It is in fact a bearing capacity problem due to unloading, and following expressions are proposed;
F = cU NC /(γH+q) (a) F = cU NC /(H (γ- cU/D) ) (b) Eq. 6.1
where
cU: undrained strength, NC: bearing capacity factor, H: depth of excavation, q: surcharge, B: width of excavation, D: distance from bottom of excavation to stiff layer if any
![]()
For deep excavations with H/B>1 Eq. 6.1a is used, and NC values are about 6-7 and in cases where H/B<1 Eq. 6.1b with NC values of 7-8 are used. If there is no stiff layer D = 0.7 B is used.
Factor of safety (F) of 2 is recommended. For F between 1.5 and 2.0 heaving displacements are observed. See NAVFAC (1982), Bjerrum and Eddie (1956) and Terzaghi (1943) for more details.
7. SUMMARY OF DESIGN STEPS IN A DEEP EXCAVATION PROJECT
To conclude the chapter on deep excavations it may be useful to go through the design steps the subject of which are the sections of the chapter:
- An office and site study on buildings and underground facilities around the excavation pit is required especially for possibility of interference of anchors and nails with adjacent basements and facilities.
- Photographs or videos of adjacent buildings, streets and other details are taken before excavations start. Any cracks, depressions etc.should be recorded, and they may be needed in future conflicts with the owners or municipality.
- Instruments planned to be used are ordered and installed before excavation starts.
- Soil profile, soil properties, groundwater level, depth of excavation, availability of certain wall types and construction details of structure are altogether considered to select type of wall and support system.
- Dewatering and drainage works are planned if any.
- Depending on the method of analysis to be used either required soil properties and water level are input or earth and water pressure diagrams are specified. If soils are represented by springs subgrade coefficients are selected.
- Support levels and horizontal spacings are selected for the first trial and so the support and wall properties.
- Initial solution for shears, moments, support reactions, displacements are obtained, and necessary changes are made before the second trial.
- From few to several trials are made in stages (staged solutions) before finalize the wall, supports and spacings.
- External stability calculations are performed.
- Anchor or strut connections to waling or breasting beams are designed.
- During construction if any excessive horizontal and vertical displacements or support reactions are recorded at a stage, diagnosis is made, and required changes or revisions are made in design and/or construction.
![]()
REFERENCES
- Bjerrum, L. And Eide, O. (1956), „Stability of Strutted Excavations in Clay‟, Geotechnique, 6, 32-47.
- BS 8081, 1989, British Standard Code of Practice for Ground Anchorages.
- CIRIA (1993), Special Pub. No. 95 „The Design and Construction of Sheet-Piled Cofferdams‟, B.P. Williams, D. Waite.
- CIRIA (1986), Report No. 113, „Control of Groundwater for Temporary Works‟ S.H. Somerville.
- Clough, G.W. and O‟Rourke, T.D. (1990), „Construction Induced Movements of In-situ Walls‟, Proc., ASCE Conf. on Des. And Perf. of Earth Retaining Struct., Geotech. Spec. Publ. No. 25, ASCE, New York, 439-470.
- FIP, State of the Art Report, Corrosion and Corrosion Protection of Prestressed Ground Anchorages, Thomas Telford, 1986.
- Katsura, Y., Kohsaka, N., Ishizuka, K., „External Forces Acting on Walls during Deep Excavations- A Survey on Japanese Codes, 1995, Underground Construction in Soft Ground, Proc. Of the Inter. Symposium on Underground Construction in Soft Ground.
- Long, M. (2001), „Database for Retaining Wall and Ground Movements due to Deep Excavations‟, Journal of Geotechnical and Geoenvironmental Engineering, ASCE.
- NAVFAC, 1982, „Foundations and Earth Structures‟, Design Manual 7.2, Department of the Navy Naval Facilities Engineering Command.
- Padfield, C.J and Mair, R.J., „Design of Retaining Walls Embedded in Stiff Clay‟, CIRIA Report 104, 1984.
- Peck, R.B., 1969, „Deep Excavations and Tunneling in Soft Ground‟, Proc., 7th Int. Conf. Soil Mech. Found. Engrg., 225-281.
- Power, J.P., „Construction Dewatering, New Methods and Applications‟, 1992, John Wiley & Sons, Inc.
- The German Society for Geotechnics, Recommendations on Excavations, 2003, Ernst and Sohn.
- Terzaghi, K. and Peck, R.B., Soil Mechanics in Engineering Practice, Wiley, New York, 1967, 2nd edn.
- Terzaghi, K. (1943), Theoretical Soil Mechanics, John Wiley and Sons, New York.
- Twine, D. And Roscoe, H.Ç., „Temporary Propping of Deep Excavations-Guidance on Design‟, CIRIA, C517 (1999).
![]()
-
Product on sale
 ASCE 7-16 Wind Load Calculation for Buildings and StructuresOriginal price was: ₹ 9,500.00.₹ 7,500.00Current price is: ₹ 7,500.00.
 -
Product on sale
 CALCULATION OF FOUNDATION BEARING CAPACITY AS PER TERZAGHIS AND IS 6403Original price was: ₹ 7,500.00.₹ 6,500.00Current price is: ₹ 6,500.00.
 -
Product on sale
 Design of Floor Slab | One Way and Two Way |Original price was: ₹ 5,500.00.₹ 3,500.00Current price is: ₹ 3,500.00.
 -
Product on sale
 Design of StaircaseOriginal price was: ₹ 12,500.00.₹ 10,000.00Current price is: ₹ 10,000.00.
 -
Product on sale
 DESIGN OF MONORAIL AS PER IS800 2007 | LIMIT STATE METHOD OF DESIGN |Original price was: ₹ 18,500.00.₹ 15,000.00Current price is: ₹ 15,000.00.
 -
Product on sale
 BRACING CONNECTION WITH GUSSET PLATE AS PER AISCOriginal price was: ₹ 18,500.00.₹ 15,000.00Current price is: ₹ 15,000.00.
 -
Product on sale
 Design of Electrical Equipment FoundationOriginal price was: ₹ 6,000.00.₹ 5,000.00Current price is: ₹ 5,000.00.
 -
Product on sale
 Design of Transformer FoundationOriginal price was: ₹ 6,000.00.₹ 5,000.00Current price is: ₹ 5,000.00.
 -
Product on sale
 Design of Box CulvertOriginal price was: ₹ 20,000.00.₹ 15,000.00Current price is: ₹ 15,000.00.